My final cel animation is one which I am very pleased with.
Although it is not in colour, I think that the content is very good, with an unusual storyline.
I think that in some short parts, the animation appears to be too fast, however, the rest of the animation timings, I am extremely pleased with.
The characters appear to be life like with realistic movements, which is something that I was hoping to achieve.
I have tried to add exaggerated expressions to my characters in order to convey the emotions of the characters, and I feel that this has been done well.
If I was to do this animation again, or continue with it further, I would spend another few months adding the rest of the colour to it, as I think that this is one thing that would perhaps improve the overall look of the animation.
Overall though, I am pleased with how this cel animation has turned out, and through doing this, I have found something which I enjoy very much!
Monday 25 July 2011
Sunday 3 July 2011
Colour Process too long
After spending what seemed like a lifetime trying to colour in my animation frame by frame, I am still only around 8 seconds into my animation!
Each individual frame takes around 1.5 hours to add colour in each separate shade/tone and outline with black. So, for my animation this would take approximately 450 hours!
It is a shame that this process is too long for this particular short project, as I think that the colour gives the animation a different dimension, and adds to its overall character.
I have, however, rendered the part complete coloured composition, and made this into a movie.
Friday 27 May 2011
Trying Colour
Even though my animation itself is technically complete, I couldn't help feeling how it would perhaps benefit from colour of some kind, so I decided to give this a go, using the previous digital method that I experimented with.


The screen shots show the process of beginning to add to colour to the frames of my animation.
I am pleased with the effect that this gives, so I am going to try to add this colour to the whole of my animation.


The screen shots show the process of beginning to add to colour to the frames of my animation.
I am pleased with the effect that this gives, so I am going to try to add this colour to the whole of my animation.
Saturday 21 May 2011
Sequence Ready
After I had put my frames into a sequence on after effects, I added the sound file and I rendered the composition and turned my frames into a running movie!
My first thoughts on the animation are that it looks quite good!
I tried to match the mouth movements of my characters with the sound from the sound file, making my characters 'speak' when the music did so. I had to be very specific with my timings in order to do this, and I think that this has worked well.
I am particularly pleased with how the characters walk, as this was a challenge to get right when I was actually drawing out each frame.
One thing that I think the animation could benefit from is colour, however.
Friday 20 May 2011
Cel Animation Complete
Finally, I have completed the cel animation, It has taken a very long time to draw out over 300 frames completely by hand.
The next step with my animation, is to scan in every single frame, and put these frames into a sequence on after effects.
The next step with my animation, is to scan in every single frame, and put these frames into a sequence on after effects.
Thursday 5 May 2011
Animation Begins
After creating an exact timing schedule for each event in the animation, I began to draw out, by hand, each frame of my animation. This is a very long process, but one which I am enjoying.
Tuesday 3 May 2011
Colour Practice
After my final decision to create my animation using the cel method, I began to think about the process of adding colour, and whether this was possible.
I carried out some research into how animations can be coloured. This research showed me that for some cartoons etc, cels are transferred to acetate sheets, and the acetate sheets themselves are painted onto. They are then overlapped with one another to create scenes.
I also discovered that a way to use colour digitally is to use the paint tools in after effects itself, I decided to give this method a go, as I would like to create a seam free animation.
I used a previous short cel animation to practice a digital colouring method.
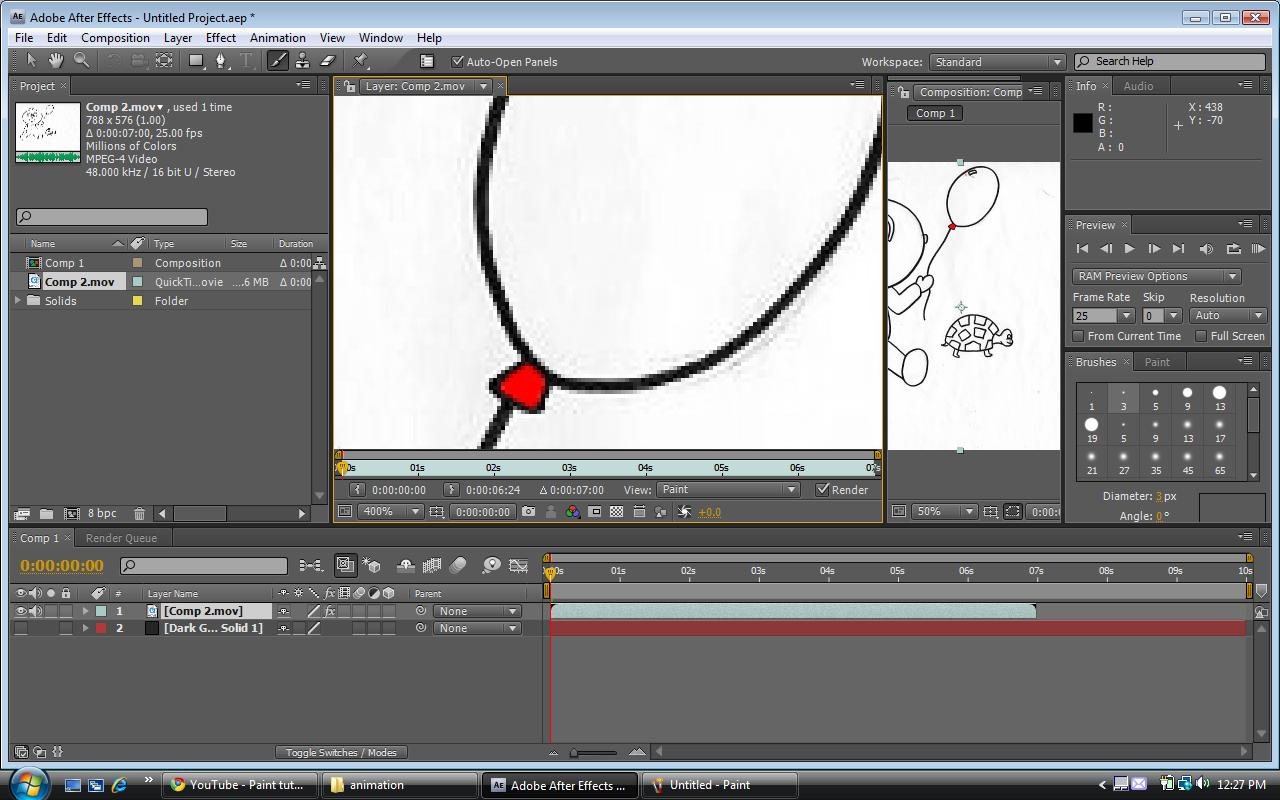
In the following screenshots, I have used the tools in after effects to add a colour onto my animation frames.
I have added the colour red to the babys balloon, by physically colouring the balloon shape once on each frame.


I also decided to experiment with a different style of colouring, a sort of scribble, I have attempted this on the baby's shoes. Once again, this was created by applying the colour once per frame. I like the effect that this method gives, as it gives the impression of movement.
I carried out some research into how animations can be coloured. This research showed me that for some cartoons etc, cels are transferred to acetate sheets, and the acetate sheets themselves are painted onto. They are then overlapped with one another to create scenes.
I also discovered that a way to use colour digitally is to use the paint tools in after effects itself, I decided to give this method a go, as I would like to create a seam free animation.
I used a previous short cel animation to practice a digital colouring method.
In the following screenshots, I have used the tools in after effects to add a colour onto my animation frames.
I have added the colour red to the babys balloon, by physically colouring the balloon shape once on each frame.


I also decided to experiment with a different style of colouring, a sort of scribble, I have attempted this on the baby's shoes. Once again, this was created by applying the colour once per frame. I like the effect that this method gives, as it gives the impression of movement.
Sunday 1 May 2011
Character Sheets
After I had chosen what my Triangle Tribe characters should look like, I decided to create some character sheets.
These are mainly to help animators when they are drawing out characters.


I have showed what the character looks like from different angles, and also showed different positions of arms and legs.
A further character sheet shows how the character would look in a variety of emotions and thoughts.

These are mainly to help animators when they are drawing out characters.


I have showed what the character looks like from different angles, and also showed different positions of arms and legs.
A further character sheet shows how the character would look in a variety of emotions and thoughts.

Wednesday 27 April 2011
Character Development
I have experimented with different aspects of the characters, such as a variety of costume designs and facial features.


I have also experimented with different perspectives and angles, drawing the character shapes in both 2 and 3 dimensions. I decided that due to the content of the animation itself, 2Dimensional characters would be more appropriate.


I have also experimented with different perspectives and angles, drawing the character shapes in both 2 and 3 dimensions. I decided that due to the content of the animation itself, 2Dimensional characters would be more appropriate.

Saturday 23 April 2011
Animation Terms
Full Animation - This involves producing high quality films that are traditionally hand drawn with a great amount of detail. They often include a range of well thought out movements. The more famous and realistic animations are often credited to the Walt Disney Studios.
Limited Animation - Mostly used as an alternative cost effective method, where the drawings tend to be much less detailed, and can even by stylized and impressionistic.
Rotoscoping - This particular technique is used when animators wish to create a movement that is very life like and realistic. It is sometimes done by tracing a live action film, by hand, frame by frame, in order to get the correct and exact movements.
Live Action/Animation - This is the name for the technique used when animators combine live action film and hand drawn characters together. This is usually done by first shooting the live action film, and then adding in the hand drawn characters afterwards, using software programs.
An example of this is in the film, 'Who Framed Roger Rabbit'.

An example of this is in the film, 'Who Framed Roger Rabbit'.

Cel Animation - Cel or hand drawn animation is the process that is used for the majority of animated films. Traditionally, this process begins by drawing out each individual frame onto paper. The illusion that the objects or characters are moving is created through each drawing being slightly different from the previous one, which eventually creates a sequence of movements.
The initial paper drawings can then be transferred or copied onto sheets of transparent acetate, which are known as 'cel's'. These can then be filled with colour.
Traditional Colour - The individual cels are coloured in by hand, using a paint such as acrylic or gouache. When the whole of a particular sequence has been hand painted, the photographing of these can begin.
Each transparent cel is laid ontop of each other, with the background cel being right at the bottom of the pile. The overall image can then be photographed using a Rostrum camera.
Digital Colour - This technique begins the exact same, with each frame being individually hand drawn. However, after this, the frames are each scanned into a computer, where they can be effectively coloured in using a range of different software's and computer programmes.
These individual, now coloured frames can then be put together on the computer, so that they can be outputted as a final film to a digital video file.
Stop Motion Practice 5 - Modelling Clay Character
After reading about how clay characters are made, designed and put together, I thought that I would try and have a go at my own (very simple) one.
One of the most important things about a clay character is that, in order for it to be able to support itself, it's core structure must be made from some sort of frame, that eventually becomes concealed inside of the character.
These are usually made professionally, and are mostly made from wire and metal. As I dont have access to these resources, I used the next best thing - lengths of wood.


A close up view.


I then worked on the first leg, giving the character a 'shoe' like shape.

Second leg.


I then stood my character upright and flattened the bottom of the shoes, allowing him to stand alone of any aid.


Standing again.


Only now was he ready for the animation.

Standing alone by the window.

I decided to do a very short and simple animation with this character. As I discovered that only using one piece of solid material for his arms and legs, meant that they were unable to be moved or bent into more 'life like' positions.
One of the most important things about a clay character is that, in order for it to be able to support itself, it's core structure must be made from some sort of frame, that eventually becomes concealed inside of the character.
These are usually made professionally, and are mostly made from wire and metal. As I dont have access to these resources, I used the next best thing - lengths of wood.

I cut out 2 arms and 2 legs from the lengths of wood.
I then used a ball of modelling clay to make the 'body' of the character. I pushed the legs and arms into the clay and into thier correct places.

A close up view.

I then used a slightly different coloured clay to make the arms and legs. I wrapped a piece around the first arm, whilst creating a lump at the end, which I then made into a hand ( of sorts ).

I then worked on the first leg, giving the character a 'shoe' like shape.

Second leg.

Second arm.

I then stood my character upright and flattened the bottom of the shoes, allowing him to stand alone of any aid.

As I thought that my character looked a little plain, I decided to add human like features, eyes, nose mouth ect.

Standing again.

As I was thinking about my themes and music, I decided to add 'feather' like objects to my character, as if it was like a hat or some kind of costume.

Only now was he ready for the animation.

Standing alone by the window.

I decided to do a very short and simple animation with this character. As I discovered that only using one piece of solid material for his arms and legs, meant that they were unable to be moved or bent into more 'life like' positions.
Thursday 21 April 2011
Stop Motion Practice 4 - Modelling Clay
I have created another stop motion animation using a different material this time - Modelling Clay.
I have been reading through a book about animation, 'The Aardman Book of 3-D Animation', and it has a tutorials for beginners working with Modelling Clay. So I decided to try these out.
I have been reading through a book about animation, 'The Aardman Book of 3-D Animation', and it has a tutorials for beginners working with Modelling Clay. So I decided to try these out.
Although I found this to be the hardest material to work with, I did however find it the most rewarding. It allowed me to be much more creative and allowed for much greater flexibility and movement.
I am going to continue to experiment with this material.
Wednesday 20 April 2011
Stop Motion Practice 3
After the previous Stop Motion research, the animation, 'Humorous Phases of Funny Faces', really appealed to me, so I decided to try out a similar sort of technique using a white board.
Although the images on my animation are relatively simple, I think that the technique itself works well.
If I was to do this again, I would make the objects themselves actually move, and hopefully therefore create a more interesting animation.
Monday 18 April 2011
Stop Motion Practice 2
I have had a second attempt at the Stop Motion technique, using a quantity of sweets.
In this experiment, I have tried to create a 'tribal' atmosphere with the sweets dancing around in a kind of celebratory manner.
I used sweets because I wanted to try out the technique using something that wasnt already a character, like the toys that I have previously used. The character and personality of the objects had to be created through the movements.
Personally, I prefer this attempt as I think it is quite humorous, as sweets clearly do not move or dance.
Sunday 17 April 2011
Stop Motion - Research
The technique of stop action, or stop motion, is one by which the character or object in question, is photographed, moved slightly, and photographed again, until some kind of movement or animation is formed.
This became the standard technique by which many cinema special effects were achieved.
The still below is from a film considered to be one of the best trick film masterpieces made.
'Voyage to the Moon' - 1902 - Melies

This clip shows the 1906 chalk animation by J Stuart Blackton, 'Humorous Phases of Funny Faces'
This was done by first off drawing the image, and then photographing it. The image was then erased and redrawn in the new movement position, and then photographed again. This was continued until the animation was finished, and an illusion of motion or movement had been created.
I think that this technique is brilliant, and it creates such an interesting effect. I would like to try out this technique for myself.
3Dimensional animation has 2 basic techniques, one using puppet models, and the other using clay models.
This is a still from children's TV show, 'The Magic Roundabout' - 1965
This was created using puppets and models.

Another still, this one from 'A Nightmare Before Christmas' - 1993. This was the first stop motion feature film to receive worldwide distribution and recognition.

A clip from the characters, 'Morph' and 'Chas'. These characters were an early creation of Peter Lord and Dave Sproxton. It first appeared in the BBC 'Vision On' series in 1976.

A still from 'A Grand Day Out' - 1989. The first Wallace and Gromit film which Nick Park completed after he joined the Aardman Studios.

This is a clip from the Lurpak adverts, with the character 'Douglas the Butterman'
I really like how smooth all of these clay animations are, and how seamless each frame is going into the next. I would like my own stop motion experiments to be as smooth as these.
Illusion - 'Persistence of Vision'
Animation in all its forms is actually an illusion. It is a trick of the eye, which is known as the 'Persistence of Vision'
The human eye sees and retains an image or frame for just a fraction of a second. So when that image is replaced with another image, slightly different and straight afterwards, movement appears to occur to the human eye.
We believe that we are seeing a movement or film, however, what is really seen is a long succession of static images, at a rate of 24 frames per second, and therefore the eye is deceived.
Saturday 16 April 2011
Eadweard Muybridge - Research
In 1872, Eadweard Muybridge produced a series of studies which included human and animal life and movement.
These were usually photographed in front of a plain backdrop, as he was looking at the mechanics of the movements being made.

These photographs were shot several times a second, to achieve a consistent movement. These separate images reveal what the eye is unable to capture, and also the sheer complexity of motion itself.
In 1880, he conducted what was to be one of his most sophisticated and important experiments.
He photographed a running horse, using 24 still cameras, which were set up alongside a race track, and were triggered by trip wires.

Muybridge then went on to do similar experiments involving dogs and humans etc.
His work with the technicalities and complexity of movement became completely indispensable to the later generations of animators.
Zoetropes - Research
The modern Zoetrope was created by William George Homer.
A Zoetrope is a device that produces an illusion, created by the rapid succession of a series of static pictures. These pictures are each different, progressing through stages of movement.
The Zoetrope is made from a cylindrical shape with vertical slits around the edge, placed an equal distance apart from one another.
Inside the cylinder, sitting below the slits, is the series of images or frames that form the particular action or movement.
The viewer looks through the slits, inside of the cylinder, and sees the through to the opposite side, as the diagram shows.
The disadvantages of the Zoetrope however, are that the movements that can be shown are limited, and of course are always repeated over and over.

Phenakistoscope - Research
The Phenakistoscope was created in 1832 by Joseph Plateau, a Physicist from Belgium.
The Phenakistoscope is made from a disc fixed to a handle, so that it is allowed to spin freely.
The disc has a series of images drawn around the outside, and these show the graduation of some kind of movement. These images are each separated by slots.
The Phenakistoscope works by being held up to a mirror and spun. The images are then viewed in the mirror through the slots, which creates the illusion of movement.

Thaumatrope - Research
The first modern Thaumatrope was made by Dr John Ayrton Paris in 1825.
A Thaumatrope is essentially a disc of card with a picture on each side, and string attached to both sides of the disc.
Commonly, the pictures are of a bird on one side, and a cage on the other. Although these pictures can actually be anything.
The Thaumatrope works by twisting the strings on either side of the disc, creating tension. When this tension is released, this causes the disc to spin so fast that it gives the illusion of the two pictures appearing together at once.
Therefore on this example, the bird appears to be in the cage.

Thursday 14 April 2011
Stop Motion Practice 1
Although I am relatively sure that I would like to create my final animation using the hand drawn cel technique, I decided to still try out and experiment with the other techniques.
Using stop motion, I have used a few toy figures to create the illusion of movement.
This short animation works on a 25 fps basis.
Overall, I think that I am happy with this stop motion animation, however I think that the actions could be smoother, and perhaps more interesting.
Tuesday 12 April 2011
Storyboard Idea
This is a finished storyboard concept which I would like to take forward.
It involves a tribe of triangles who begin to dance on the top of a hill. One triangle gets too close to the edge and falls off. As he rolls down the hill, he bounces and hits rocks, which makes him change shape from a triangle to a circle. When he reaches the bottom of the hill, a tribe of circles think that he is a member of their tribe, and carry him away.
I think that I would use cel animation to create this story.


Subscribe to:
Posts (Atom)