Thursday 17 February 2011

Paper Workshop 1 - 28/01/11 - Continued.....Again

Further experimentation with finding ways to create curves in the paper:

On this experiment, I dealt with the paper in two identical halves. 
I cut the paper into roughly the same width strips, and cut small slots directly above each strip, and therefore then repeated this same method on the opposite half of the paper.


I began to fold each strip into its accompanying slot, both of these halves heading towards the centre in the same direction.


These photographs show the finished curved structure which has been turned over the other way around. I think that the small tabs sticking out, make the structure look like some kind of insect.


These photographs show the structure from the top, and looking through and inside of the structure.


When I curved the structure into a kind of semi circular shape, I found that it looked MUCH more interesting as a design!


This structure has definitely been the most successful one that I have done so far, and has certainly been my favourite. I like the way that the structure looks curved in several ways. The structure also looks effective from both the 'outside' and the 'inside' views.

Paper Workshop 1 - 28/01/11 - Continued

As I had previously decided that I preferred the curved forms, I began to focus more on this particular behaviour, and tried to understand the limits of the paper itself.

I started this attempt by using the same method as I did previously, by making small slots to fit each strip of paper into. The difference this time however was that I decided to change the width of each strip from small to large across the sheet of paper.


I continued with this same method until all of the strips of paper were in the correct slots.


I really liked the curved formation of this design but I think that the 'unused' extra pieces of the paper strips almost spoil how well this design works.

However, I think that this photograph from the opposite angle improves the whole design entirely! It has a more sleek finish and doesn't show the extra left over pieces of paper strips.


These photographs showing a slightly 'side on' view of the design are quite interesting to see how the paper flows and turns throughout the curve. The papers behaviour reminds me of the way that ribbon twists and turns.


I continued further with this same method and basic rules to create more curved designs.
On this one, I kept the paper straight and did not twist each strip before putting each one into a slot.


I also varied the width of each strip and the length of each curve, and continued the design until each strip was in a slot.


The above photograph shows inside and through the design, which I think gives it an interesting and different viewpoint.
This photograph is from a viewpoint above the design, and I think that the overall shape looks very similar to the natural shape of a shell that would be commonly found on a beach.

Friday 4 February 2011

Paper Workshop - 28/01/11

This first Skills Workshop was focused on the manipulation of paper by using a variety of techniques to create 3Dimensional structures.
The workshop was directed by Richard Sweeney, who specialises in this type of art.

Richard began the workshop by showing a small selection of his work, and then went on to demonstrate a few of the techniques that he uses to create 3D forms and structure.

We then we given the task of creating these forms, following a specific set of guidelines, using:

  • 1 A5 flat sheet of paper
  • A scalpel
  • Your imagination!
Another specific rule was that NO adhesives or tapes of any form could be used.


One of the techniques that Richard demonstrated was to score the paper using a scalpel, and then folding along the score line to give the paper a defined edge and dimension.


This is my first attempt at the scoring technique, and although this is not a particularly interesting form or shape, I can see how the scoring method can be used very effectively after more practice.

Another technique that was demonstrated was the method of creating tabs and slots in the paper in order to eliminate the need for adhesives. This technique was the one which I found to be most interesting, and therefore the one that I experimented mostly with in this workshop.


This photograph shows my first attempt at the tabs method, combined with the previous scoring method.
Again, I am not particularly satisfied with the sculpture itself, but I can definitely see how this technique could be incredibly useful in creating non adhesive 3D forms.

After the first attempt, I began to use these methods in different ways in order to experiment with the capabilities, qualities and limitations of the material itself.


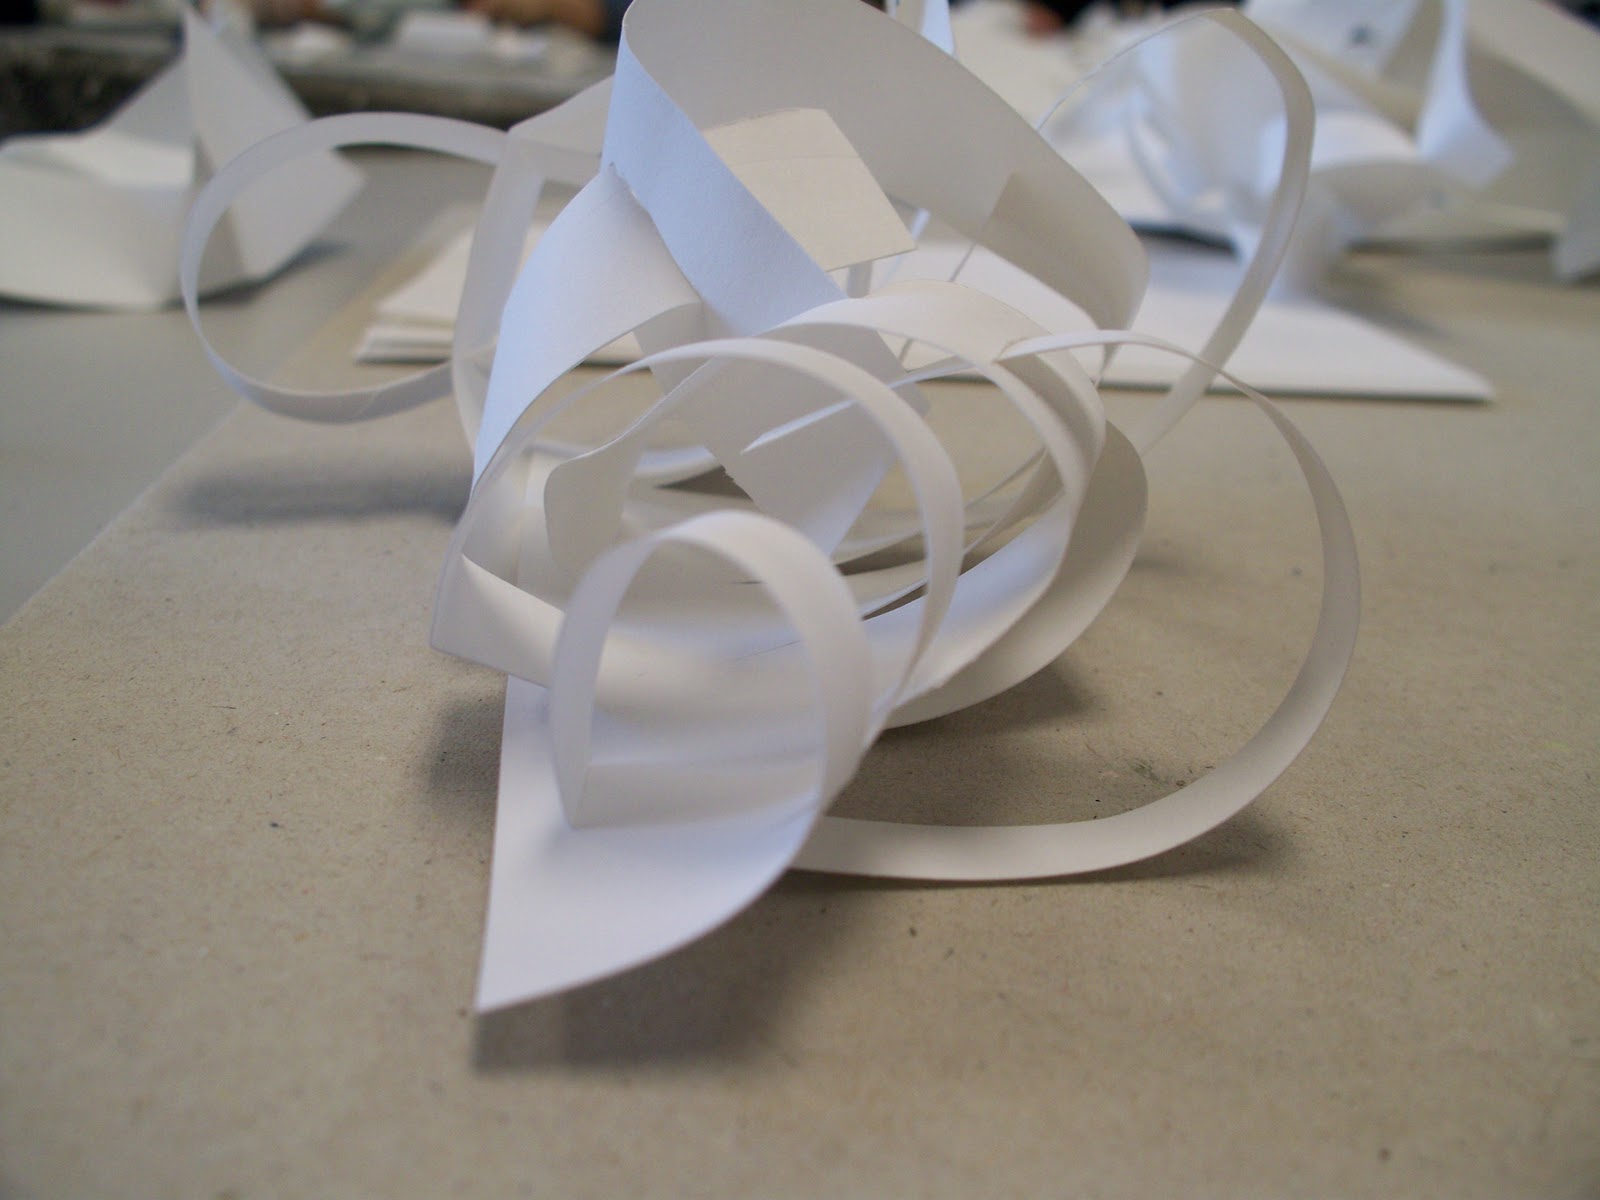
I used the scalpel to slice the paper into long thin strips, whilst leaving a small section at the top untouched, to ensure the paper did not separate completely. I then cut tabs above each strip, and slotted the strip of paper into the slot directly on the right.


As I progressed onto the further strips, I began to vary the length of the strip that was slotted each slot, which created an increasing size effect. This particular shape reminds me of a typical shell that can be found on a beach.


After slotting the first 4 strips into the slots, I cut further slots in some of the curled strips themselves, and slotted the remaining strips into those. However I felt that after doing this, the sculpture did not work as well aesthetically as it did before.
Nevertheless, I continued with this method so that I could assess the final outcome once it had been totally finished.


The remaining paper from each strip was then fitted into a newly made slot, until all of the material had been 'used'.


This is the final outcome of that particular attempt. Overall I think it does work much better than it did halfway through the construction, but I do prefer the more consecutively curved structures. I think that this design would look more effective on a larger scale.